Invoice Manager for Sheets™ by Marinette

Track clients, generate PDF invoices, and get paid. Without leaving Google Sheets™.

Keep your client list, invoices, and one-click PDF invoices all in one place, right inside Google Sheets. No new app to learn. No subscription to manage. Just your spreadsheet, working harder.
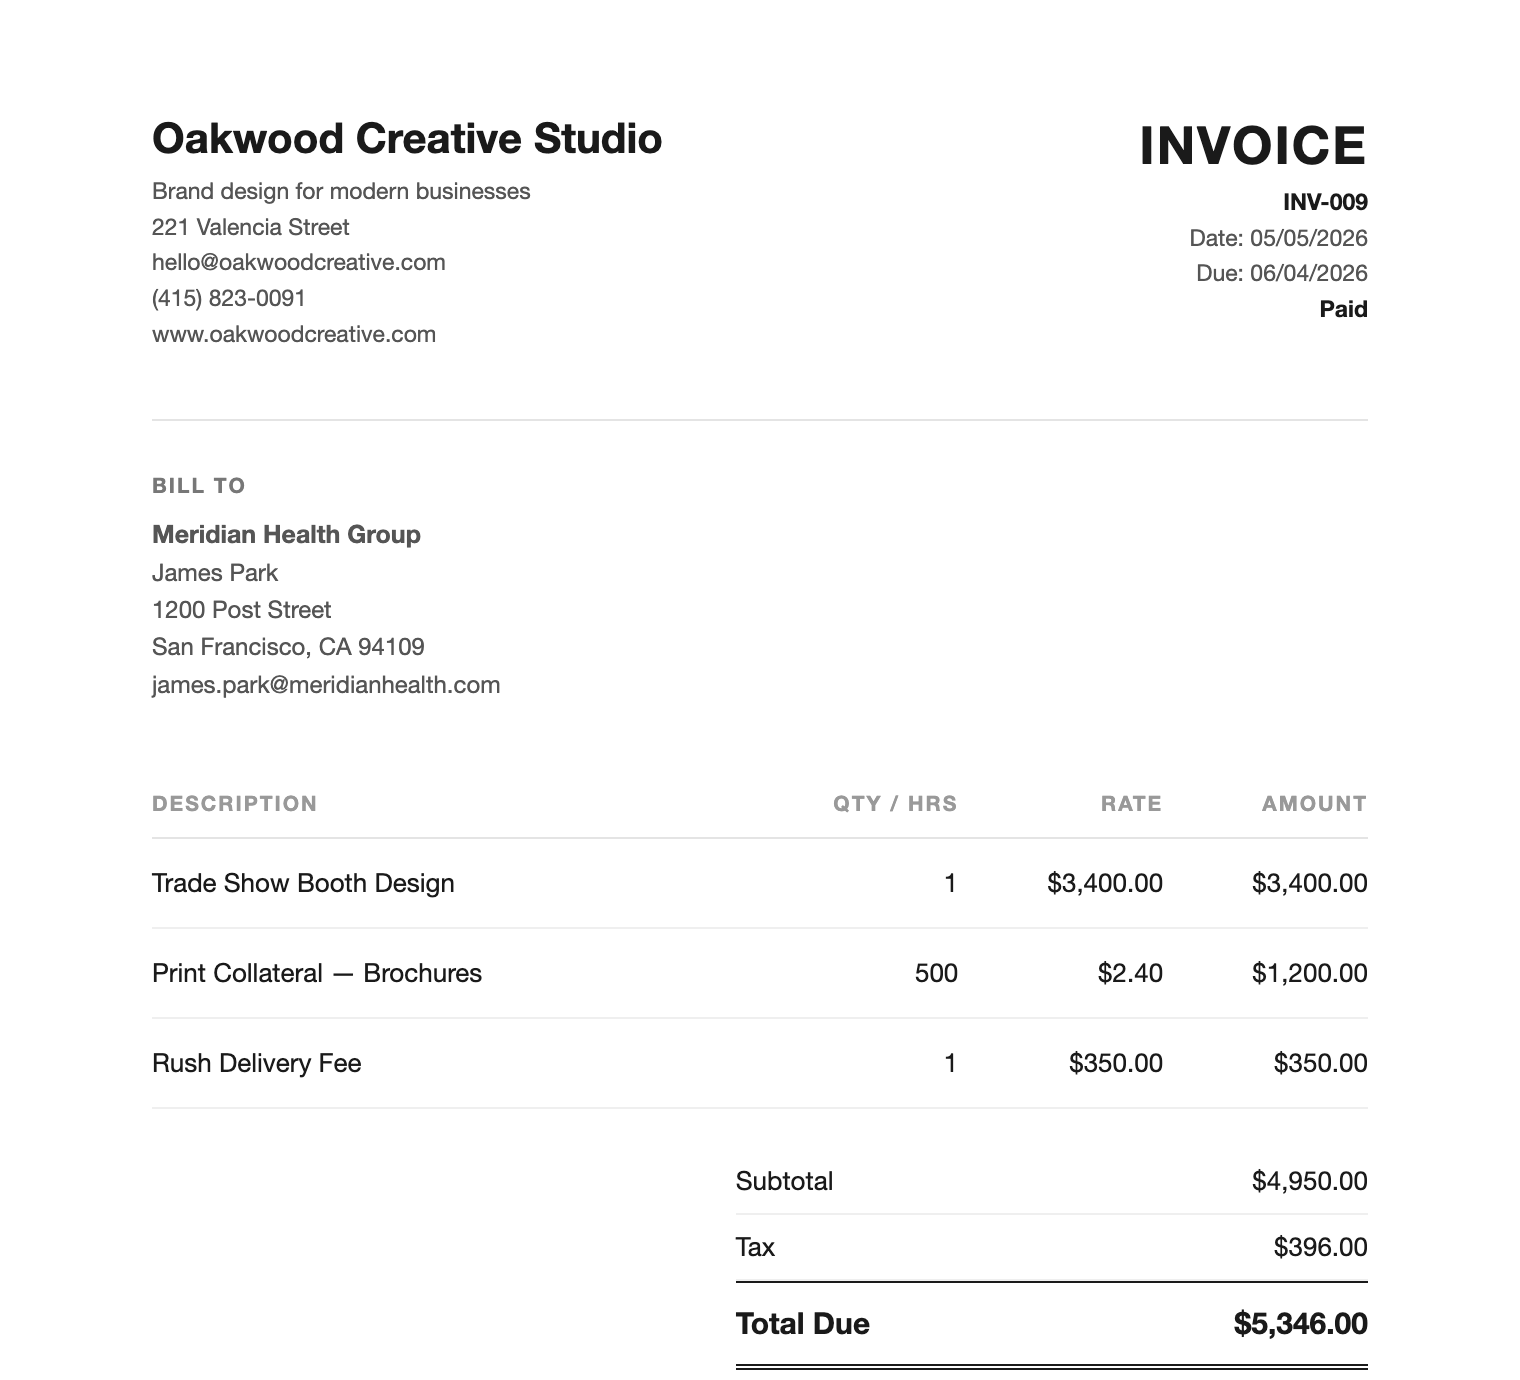
A generated PDF invoice with three line items, subtotal, tax, and total due
Install free from the Google Workspace Marketplace™ → Questions? See the FAQ →

Free to install · Your data never leaves Google

When you install, Google shows a screen of permission boxes that all start unchecked. Tick every one, or the add-on cannot do its job.
How it works

Up and running in five minutes

1

Add your details

Business name and payment terms live in Settings.

2

Add your clients

Client IDs will autocomplete as you add invoices.

3

Generate a PDF

Check a box. Your PDF is generated and saved instantly.

4

Send and get paid

Gmail™ opens pre-filled. Hit send and track status in the sheet.

See it in action

From "who owes me?" to paid

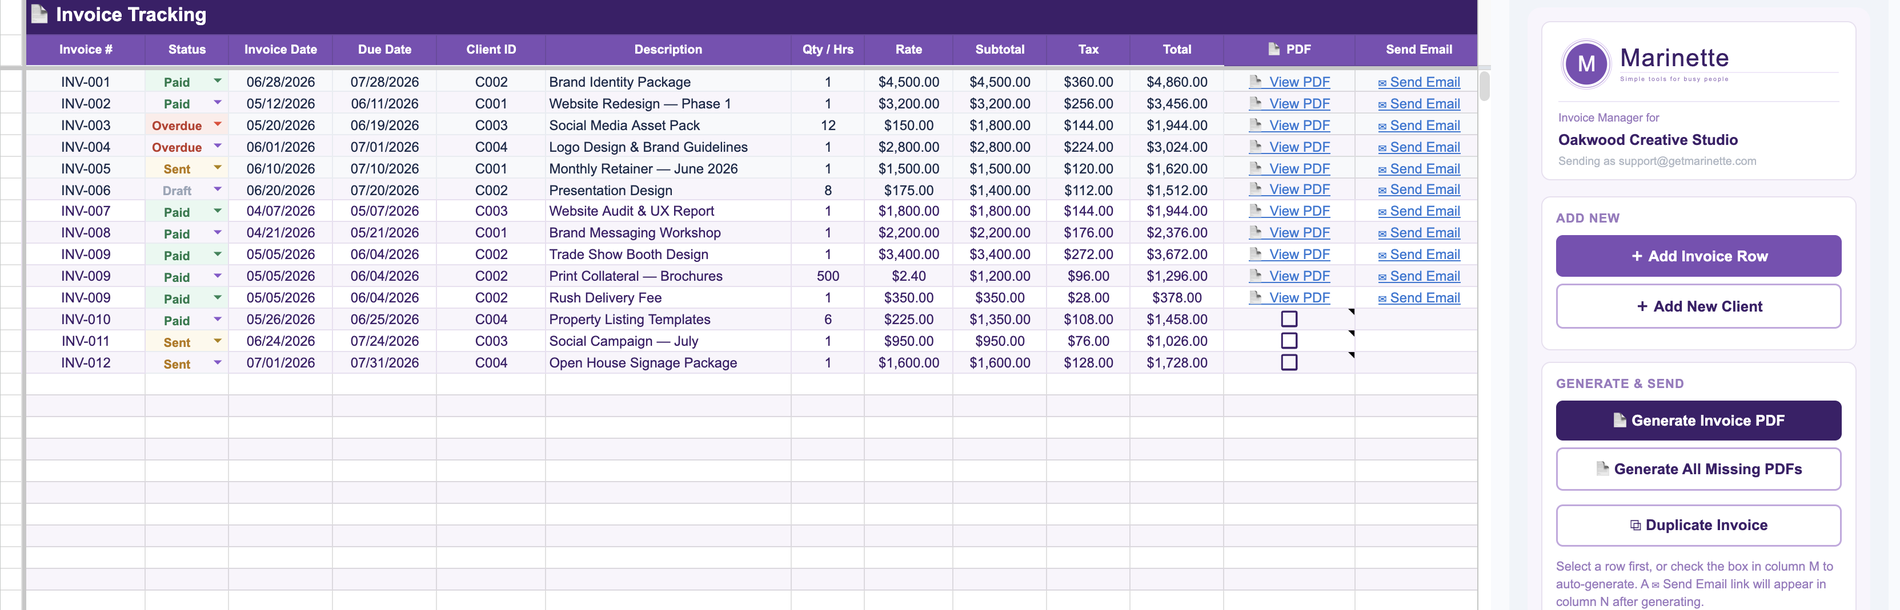
The Invoice Tracking sheet: fourteen invoices with color-coded statuses, PDF links, and Send Email links, beside the Invoice Manager sidebar

Every invoice in one sheet.

Statuses color themselves, overdue flags itself, and each PDF is one checkbox away.

A generated PDF invoice with three line items, subtotal, tax, and total due

You check a box. A PDF invoice appears.

Your business name, terms, and line items, laid out clean and saved to your Drive.

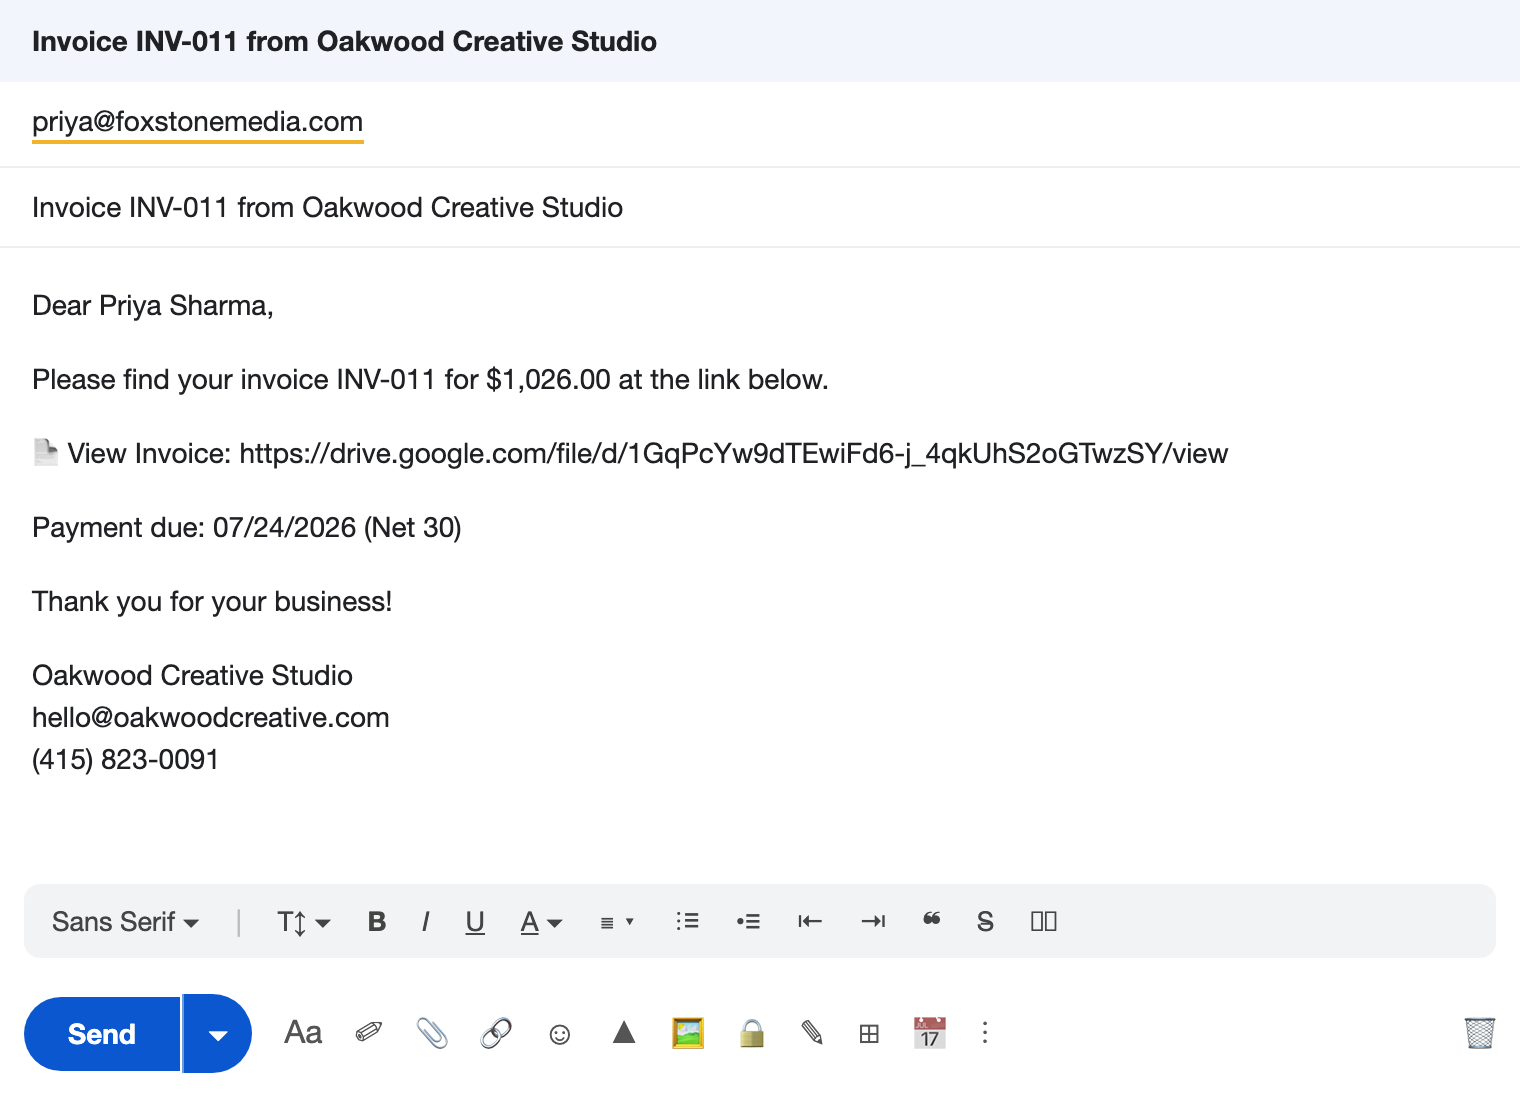
Gmail compose window pre-filled with the client's email, subject line, invoice link, and due date

The invoice email writes itself.

Gmail opens pre-filled with your client, the PDF link, and the due date. You just click Send.

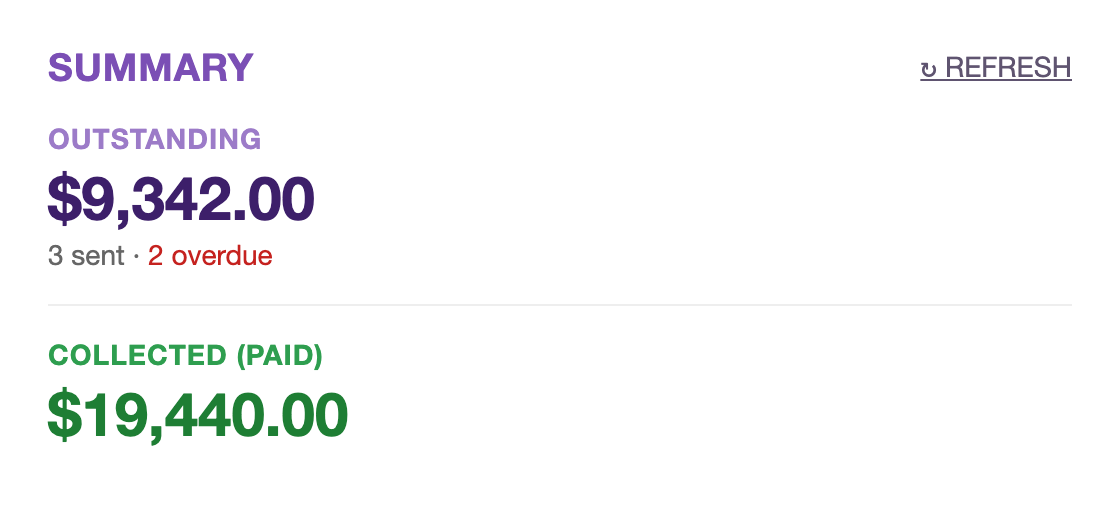
Sidebar summary showing outstanding and collected totals

Know who owes you.

Outstanding and collected, totaled in the sidebar every time you open the sheet.

Built for people who already live in Sheets

Your data stays in Google

Everything is processed within your Google account. Nothing is stored or transmitted to external servers.

Looks professional

Auto-numbered invoices with your prefix, your business details and payment terms on every PDF, and an optional review link to grow your reputation.

Get paid faster

Track invoice status right in your sheet. Overdue invoices flag themselves automatically when you open it.

No new software

No new platform to learn, no subscription to cancel. Just your Sheet, working harder than before.

Ready to send your first professional invoice?

Free to install · Up and running in five minutes · Questions? Email me.

Install free from the Google Workspace Marketplace™ →

Common questions

After installing the add-on, open any Google Sheet and go to Extensions → Invoice Manager for Sheets™ → Set Up New Sheet. This creates three tabs: Invoice Tracking (your main workspace), Client Database, and Settings.

Fill in your Settings tab first. Your business name, email, and payment terms are used on every PDF and email you send. Then add at least one client before creating your first invoice.

The essentials are your Business Name, Email Address, Invoice Prefix (e.g. INV-), Default Tax Rate, and Currency Symbol. These appear on every invoice PDF.

You can also add a tagline, phone, address, website, payment terms, a footer note, and a review link (Google, Yelp, or any URL). When filled in, a "Leave us a review" link is added to your invoices and emails automatically.

Go to Extensions → Invoice Manager for Sheets™ → Add New Client (or use the sidebar). You'll need a contact name and email address. The email is used to pre-fill Gmail and share the PDF with your client. Company name, address, and zip are optional.

Each client gets an auto-generated Client ID. If you already have clients with a custom format (like C-001 or CLI100), Invoice Manager detects that format and continues it automatically.

Go to Extensions → Invoice Manager for Sheets™ → Add Invoice Row (or use the sidebar). Fill in the invoice number (auto-filled based on your existing invoices), select a client, add a description, quantity or hours, and your rate.

The new row is added to your Invoice Tracking tab with today's date and a due date 30 days out. Subtotal, tax, and total calculate automatically.

Once your invoice row has a Qty and Rate filled in, check the checkbox in column M. Invoice Manager generates a professional PDF, saves it to your Google Drive™, shares it with your client (view only), and replaces the checkbox with a link to the file.

If you delete the PDF link from column M, the checkbox restores itself automatically so you can regenerate. You can also use Generate All Missing PDFs from the menu to bulk-generate PDFs for any rows that don't have one yet.

Two common causes: the invoice row is missing a Qty or Rate (a $0 total is blocked), or the Client ID doesn't match any entry in your Client Database tab. If an error dialog appears, it will tell you exactly what's missing.

Generate the PDF first (check the box in column M), then click the ✉ Send Email link that appears in column N. Gmail opens pre-filled with your client's email address, a subject line from your Email Subject Template, and a message body with the PDF link, due date, and payment terms. Review it and hit send. Invoice Manager never sends email on your behalf.

The sidebar shows a "Sending as [your email]" line at the top so you can check before clicking the send link. If it shows the wrong account, switch to the correct Google account in your browser first, then click the link.

Use the sidebar buttons or the menu to mark invoices as Sent (blue), Paid (green), or Overdue (red). Every time you open your spreadsheet, Invoice Manager also checks automatically. Any Sent invoices whose due date has passed are marked Overdue so nothing slips through.

Yes. The ⚙ Settings tab has an Email Subject Template row. Type any text and use placeholders that fill in automatically for each invoice: {{invoice_num}}, {{client_name}}, {{company}}, {{amount}}, {{due_date}}, {{payment_terms}}, and {{biz_name}}.

For example: Invoice {{invoice_num}} from {{biz_name}}, due {{due_date}}. The same placeholders work in the email body, which also supports {{pdf_link}} and {{footer}}.

Template customization and support for quotes and estimates are both coming. Email me to vote. Requests from real users decide what gets built next.

Everything stays in your Google account. Invoice Manager reads and writes to your Google Sheet and saves PDFs to your Google Drive. No data is transmitted to or stored on external servers.

Each permission maps to one specific feature:

  • "See, edit, create, and delete all your Google Sheets spreadsheets": how the add-on reads and writes your invoice workbook.
  • "…only the specific Google Drive files you use with this app": the narrow Drive permission. It can only touch the PDF invoices it creates; the rest of your Drive is invisible to it.
  • "Connect to an external service": how PDFs get saved. The "external service" it connects to is Google's own Drive system.
  • "Display and run third-party web content": the sidebar and dialogs you see inside Sheets.
  • "Run when you are not present": Google's standard wording for the small background trigger that watches for your checkbox in column M and colors your statuses. It runs only when your invoice sheet is edited, and touches nothing else.

Nothing is ever sent outside your Google account, and I never see your data. See the privacy policy for the full details.

That almost always means the browser is signed into more than one Google account. Google routes add-on sidebars to whichever account signed in first, so the sidebar can end up running as the wrong one. It's a known Google limitation that affects every add-on from every developer. Nothing is wrong with your invoice workbook or your data.

The quick fix: open the spreadsheet in a window signed into only the account you use with the add-on. The lasting fix is giving each Google account its own Chrome profile. Here's the full explanation and both fixes.

Still have a question? I'm happy to help.

Email support@getmarinette.com